Install the chat on your site
Where to get the widget code, where to paste it and how to check the chat is live. Ready-made plugins for WordPress and 1C-Bitrix.
To put the chat on your site you only need to paste a short snippet once. No developer required — it usually takes a couple of minutes.
Step 1. Open the Integration tab
In ChatDeck go to Settings (the gear in the left rail) and open the Integration tab.
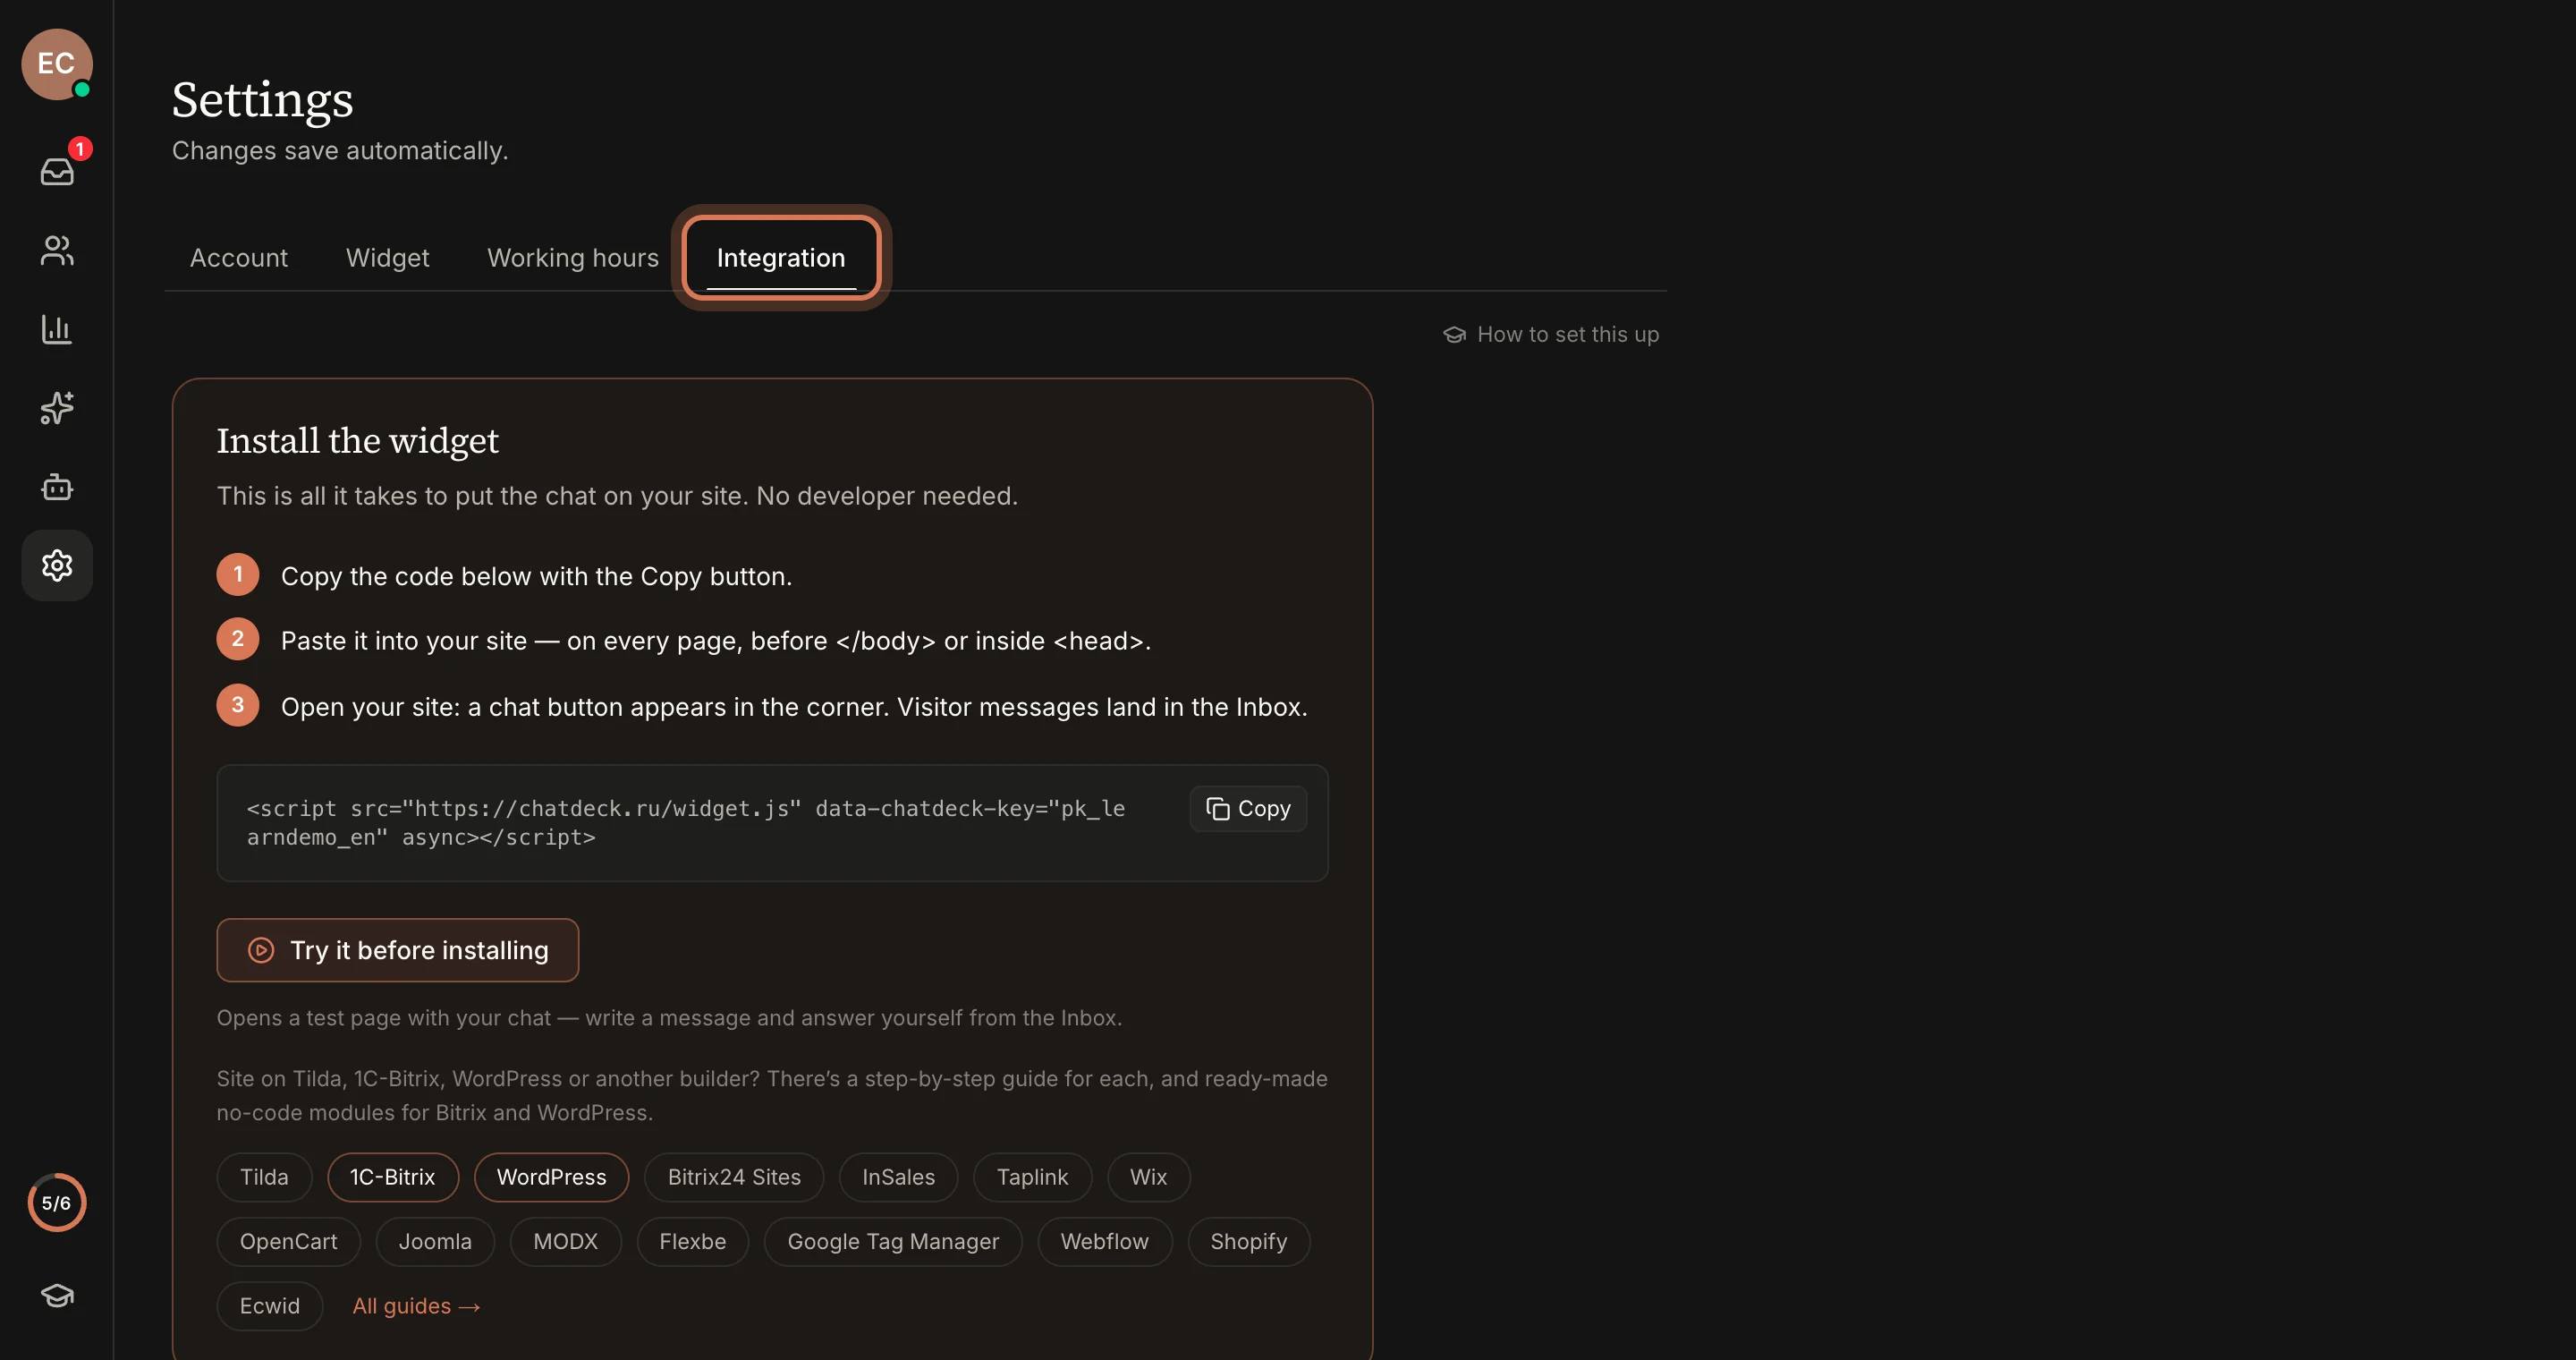
Step 2. Copy the code
The "Install the widget" block already contains the code with your workspace key. Click Copy.
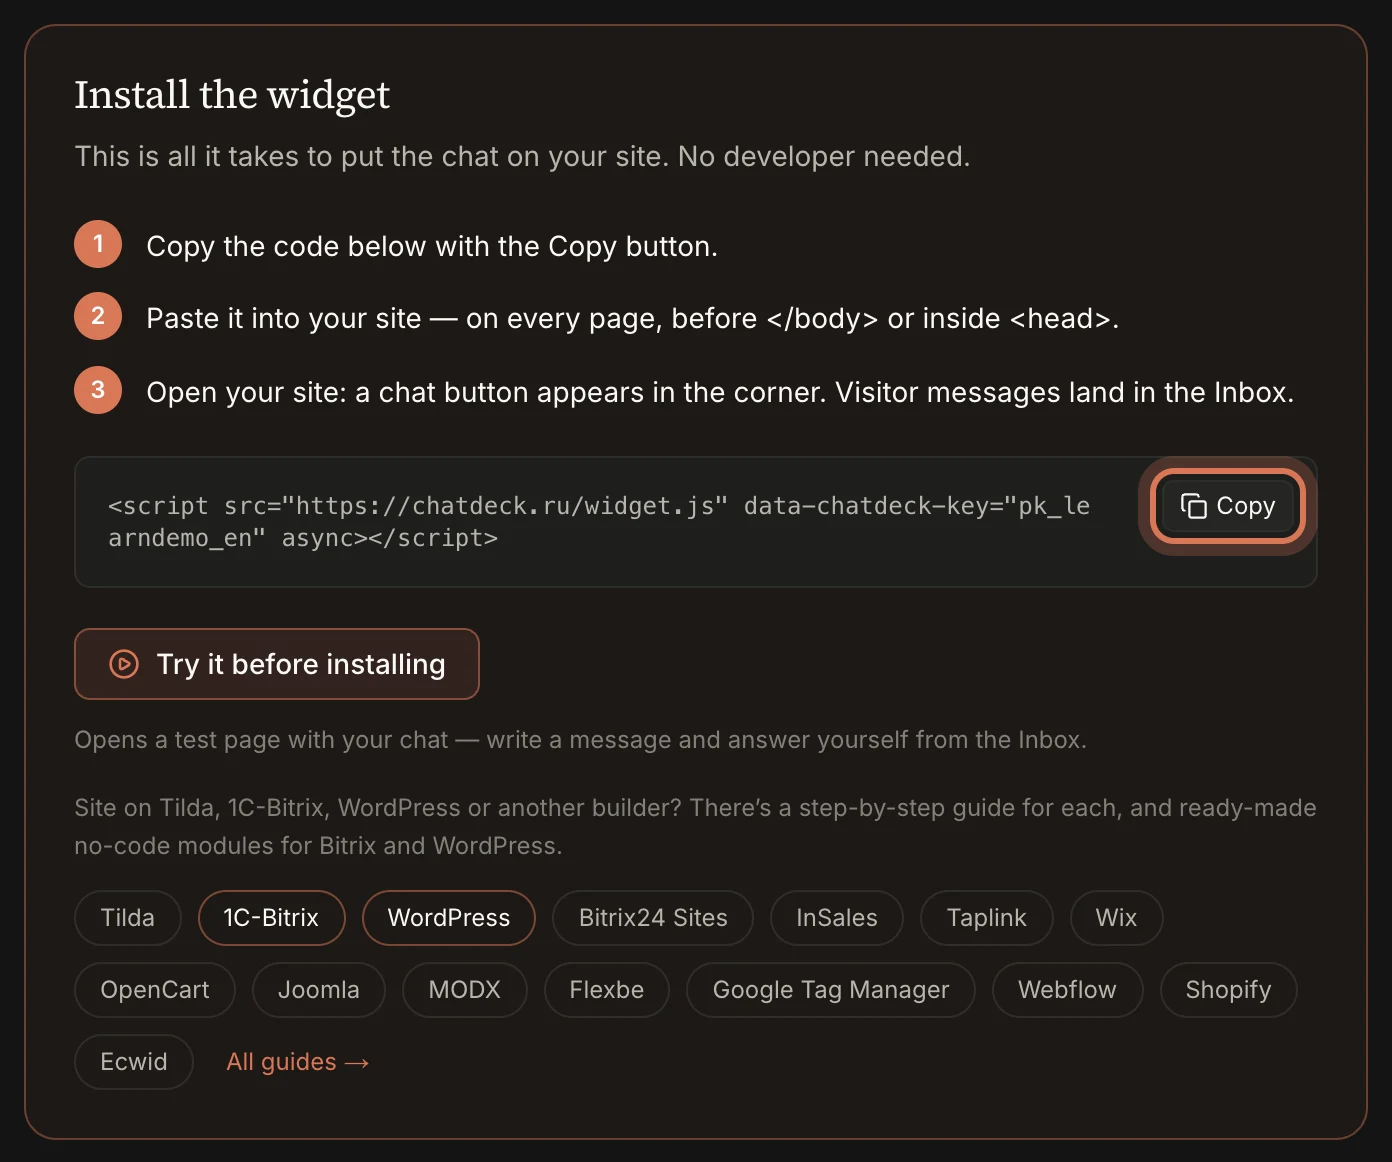
It's a single line like this:
<script src="https://chatdeck.ru/widget.js" data-chatdeck-key="pk_…" async></script>
Step 3. Paste it into your site
Add the line to every page of your site — just before the closing </body> tag or inside <head>; both work.
- WordPress and 1C-Bitrix — install the ready-made plugin: no code, just your key. WordPress plugin, Bitrix module.
- Shopify, Wix, Webflow, Squarespace and more — step-by-step guides on the Integrations page.
- Your own site — paste the code into the shared template (often
footer.php, alayoutorbase.html).
The script loads asynchronously and lives in an isolated Shadow DOM, so it doesn't slow your site down or touch its styles.
Step 4. Check it works
Open your site in another tab — a chat button appears in the bottom-right corner. Send a test message: it arrives in the Inbox right away.
If there's no button:
- Hard-reload the page (Ctrl+F5 or Cmd+Shift+R).
- Make sure the whole line is on that page.
- On a site builder, republish your pages.
Next: style the widget to match your site.
Still have questions? Write to support@gptunnel.ru — we’ll help you get set up.