Tell the chat who the visitor is
For sites with user accounts: pass the customer’s name, email and any other fields to the chat. Agents see them next to the conversation, and the customer keeps one thread on every device.
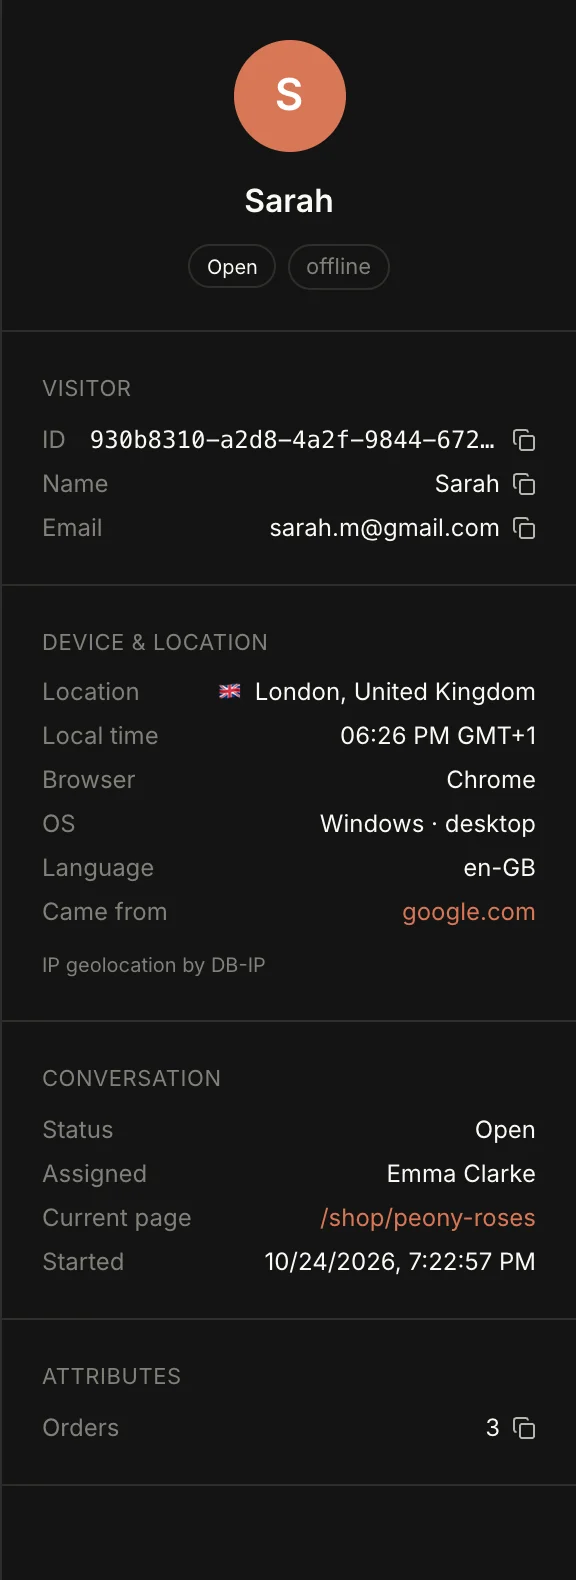
Out of the box every visitor in the chat is anonymous: "Visitor #a1b2c3". If your site has user accounts, you can tell the chat who's writing. Then the agent sees the name, email and, say, the customer's plan or number of orders straight away — no need to ask.
This lesson is for whoever edits your site's code. If your site runs on WordPress or 1C-Bitrix, you don't need a developer — see Step 5.
What you get
- The chat list shows the customer's name instead of "Visitor #…".
- The Details panel on the right gets a Visitor block (ID, Name, Email, Phone — click to copy) and an Attributes block with every other field you passed.
- One conversation per person. Without identification the history lives in the browser, so the customer's phone and laptop end up in different chats. With it they see one thread wherever they're signed in.
Step 1. Find the sample code
- Open Settings → the Integration tab.
- Click For developers — optional to expand it.

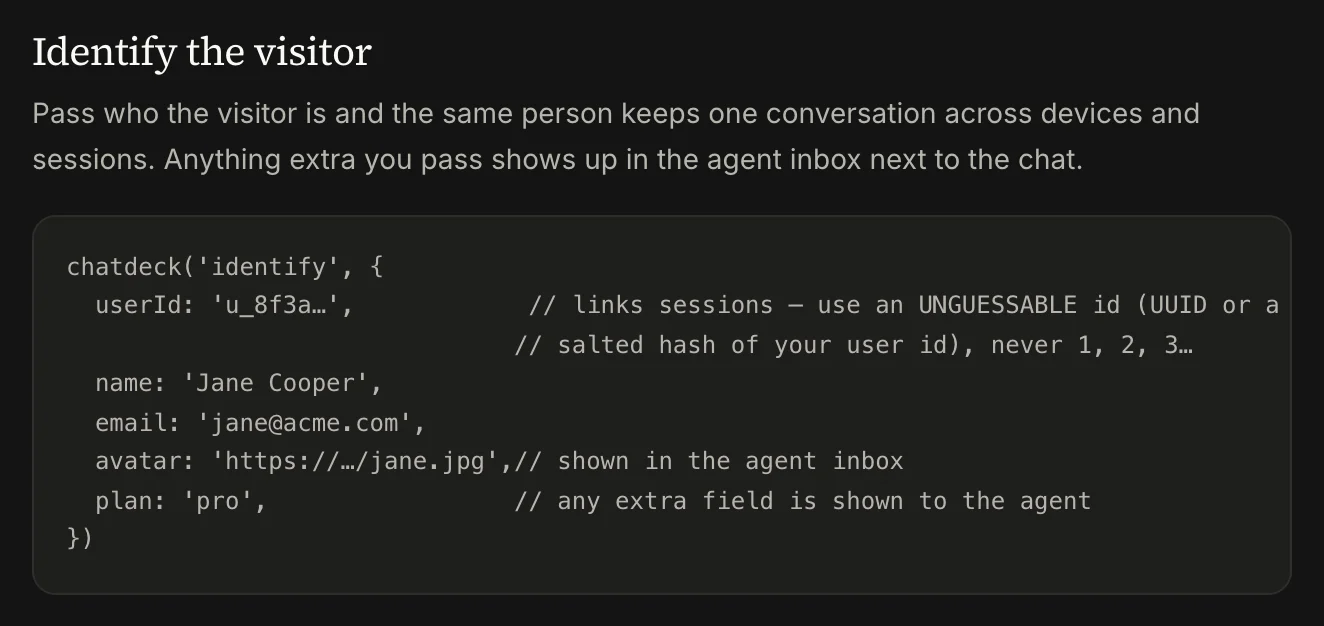
The Identify the visitor section has a ready-made example.
Step 2. Call identify once the customer signs in
On pages where the customer is signed in, call:
chatdeck('identify', {
  userId: 'u_8f3k2m9q',          // your permanent customer ID
  name: 'Sarah Miller',
  email: 'sarah@example.com',
  phone: '+44 7700 900123',
  avatar: 'https://example.com/avatars/sarah.jpg',
  Orders: 3,                      // any fields of your own
  Plan: 'Premium',
})
What the fields mean:
- userId — the customer's permanent ID in your system. ChatDeck uses it to join every session and device into one conversation. Without it the other fields are still saved, but only for this browser.
- name, email, phone — shown in the Visitor block. The name (or email) replaces "Visitor #…" in the chat list.
- avatar — an image URL, shown in the chat list and the panel.
- Any other field — text, a number or true/false — goes to the Attributes block under the name you gave it. Handy for plan, order total, city or a CRM ID.
The data updates on every call: if something changed, just pass the new values.
Step 3. Calling before the widget has loaded
The widget script loads asynchronously. To call chatdeck('identify', …) straight away, even before the widget is ready, put this line before the install snippet — it queues your calls, and the widget runs them as soon as it loads:
<script>window.chatdeck=window.chatdeck||function(){(window.chatdeck.q=window.chatdeck.q||[]).push(arguments);return false}</script>
<script src="https://chatdeck.ru/widget.js" data-chatdeck-key="pk_…" async></script>
<script>chatdeck('identify', { userId: 'u_8f3k2m9q', name: 'Sarah Miller' })</script>
Call identify as early as you can — on page load. If the customer wrote anonymously and signed in afterwards, that anonymous chat stays a separate conversation.
Step 4. Security: make userId impossible to guess
identify runs in the browser, so anyone can call it with someone else's userId — and read that person's conversation. So:
- Don't use simple sequential numbers like
42, or an email address, as the userId. - Do use a long random ID (a UUID) or a hash of the customer ID with a secret salt that only your server knows.
- Don't put anything in attributes that agents shouldn't see: passwords, full card numbers, ID documents.
Step 5. WordPress and 1C-Bitrix — no code
The ready-made plugins pass signed-in users' details for you:
- WordPress — in the plugin settings (Settings → ChatDeck) turn on Signed-in users. The name, email and avatar go to the chat. More about the plugin.
- 1C-Bitrix — in the module settings turn on the option to show agents the name and email of signed-in users. More about the module.
How to check
- Sign in on your site as a test customer and write in the chat.
- Open that conversation in the Inbox and click the i icon in the header if the panel is hidden.
- The Details panel should show the name, email and your attributes.
- Open the site on another device as the same customer — the chat shows the same conversation.
Still have questions? Write to support@gptunnel.ru — we’ll help you get set up.