Working in the inbox
Where new chats wait, how to pick up a conversation, reply, quote, send a file and resolve it. Plus the visitor details panel and the Away status.
The Inbox holds every conversation with your website visitors. This is where you see who's waiting, pick up chats, reply and resolve questions. Every role has the Inbox — agents and admins alike.
Step 1. Get to know the screen
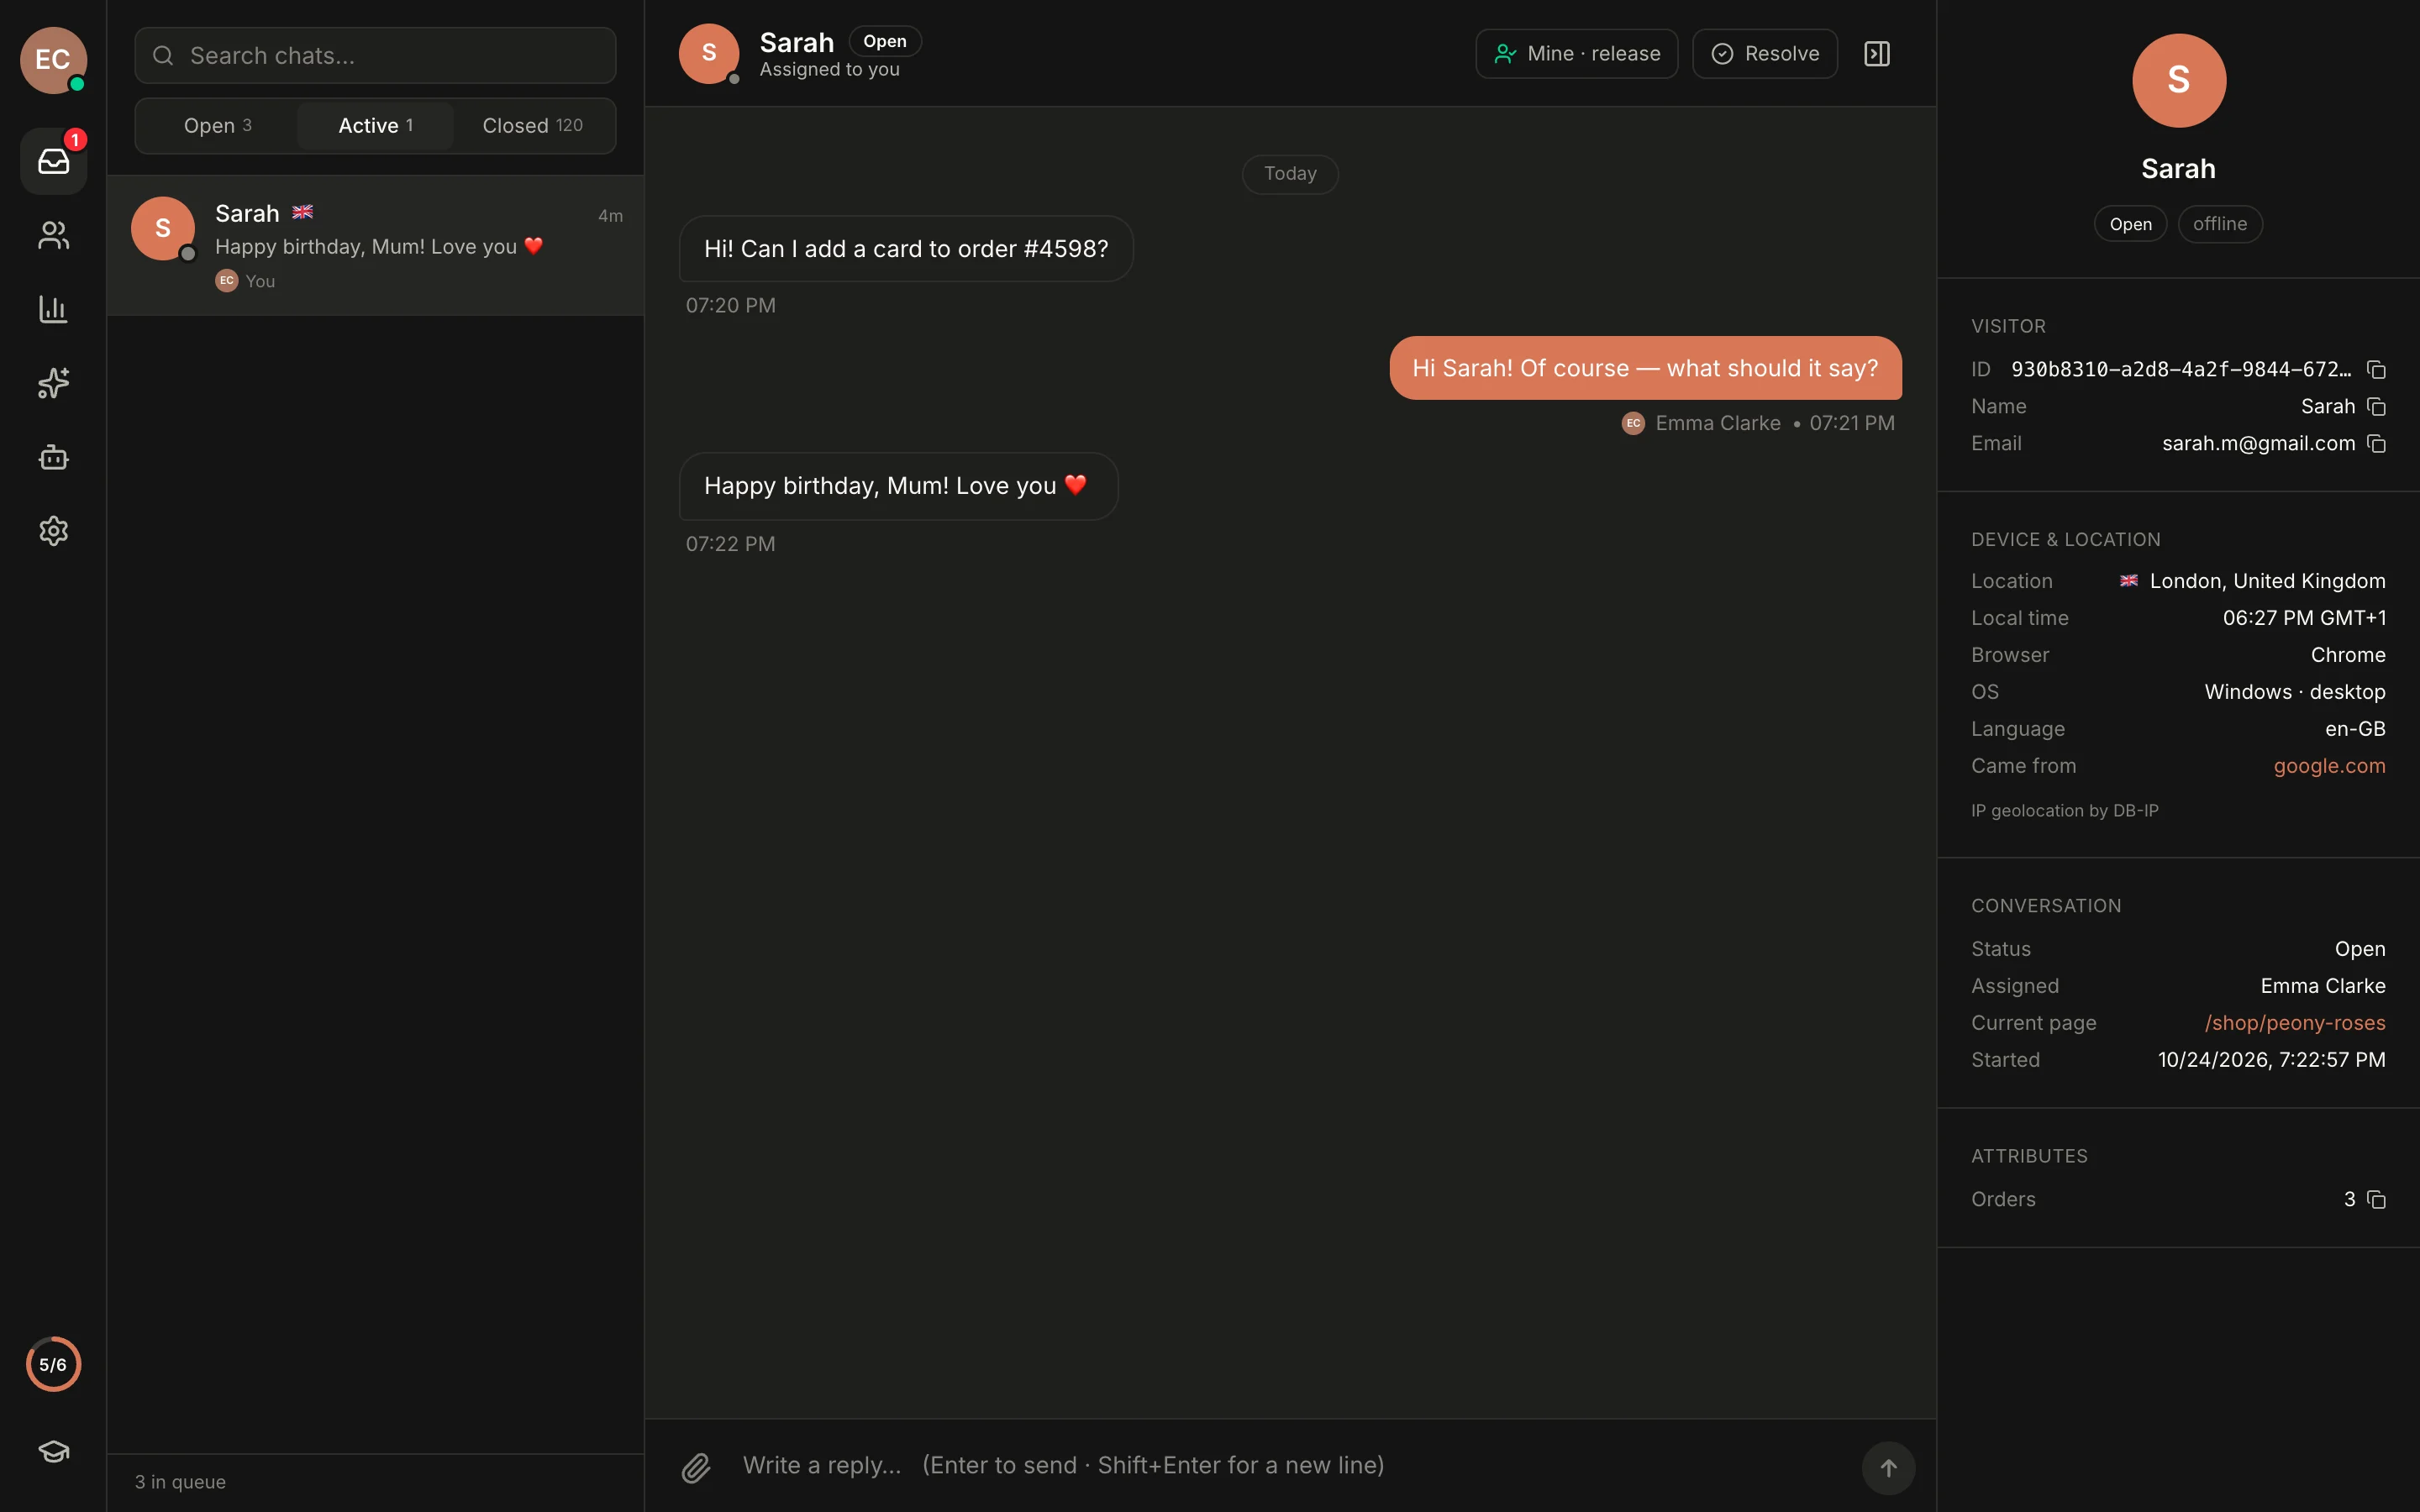
Open the Inbox (the top icon in the left rail). The red number on the icon shows how many chats are waiting for a human.
The screen has three parts:
- Left — the conversation list, search and tabs.
- Centre — the thread with the selected visitor and the reply box.
- Right — the visitor details: who they are, where they're from and which page of your site they're on right now.
Step 2. Find chats waiting for a reply
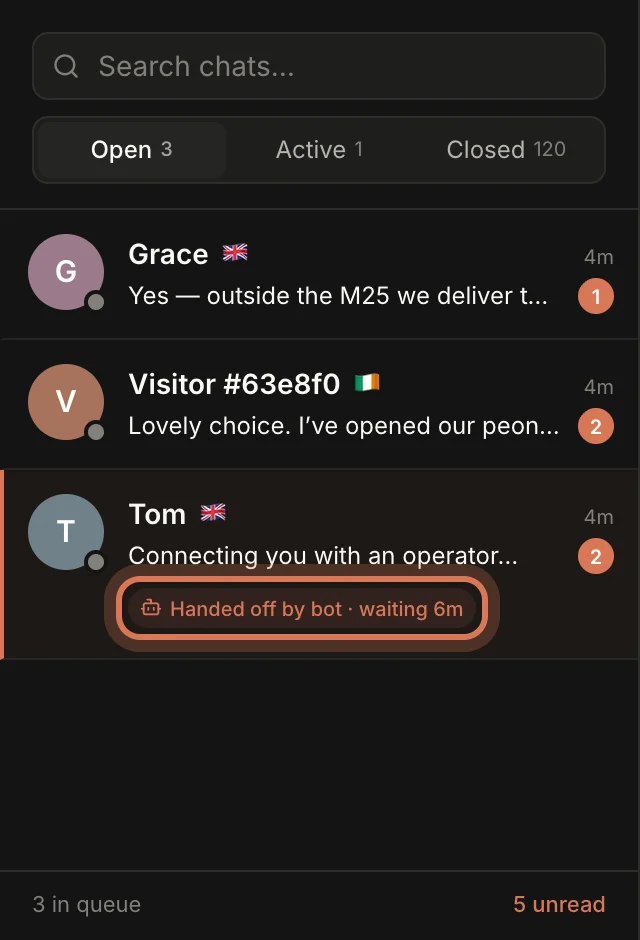
There are three tabs at the top of the list:
- Open — chats nobody has taken yet. Conversations the AI assistant is currently handling show up here too.
- Active — chats someone is already handling (you or a colleague).
- Closed — finished conversations.
When the bot couldn't help and called for a human, the row gets an accent stripe on the left and a "Handed off by bot · waiting Nm" tag — pick these up first. The number in the bubble on the right is unread messages.
The Search chats… box searches all tabs at once: names, emails and message text.
Step 3. Pick up a chat
Click a row in the list to open the thread. You can see everything the visitor discussed with the bot; the assistant's replies are labelled "Assistant".
Click Assign to me — the chat moves to the Active tab and becomes yours, and the bot stops replying in it.
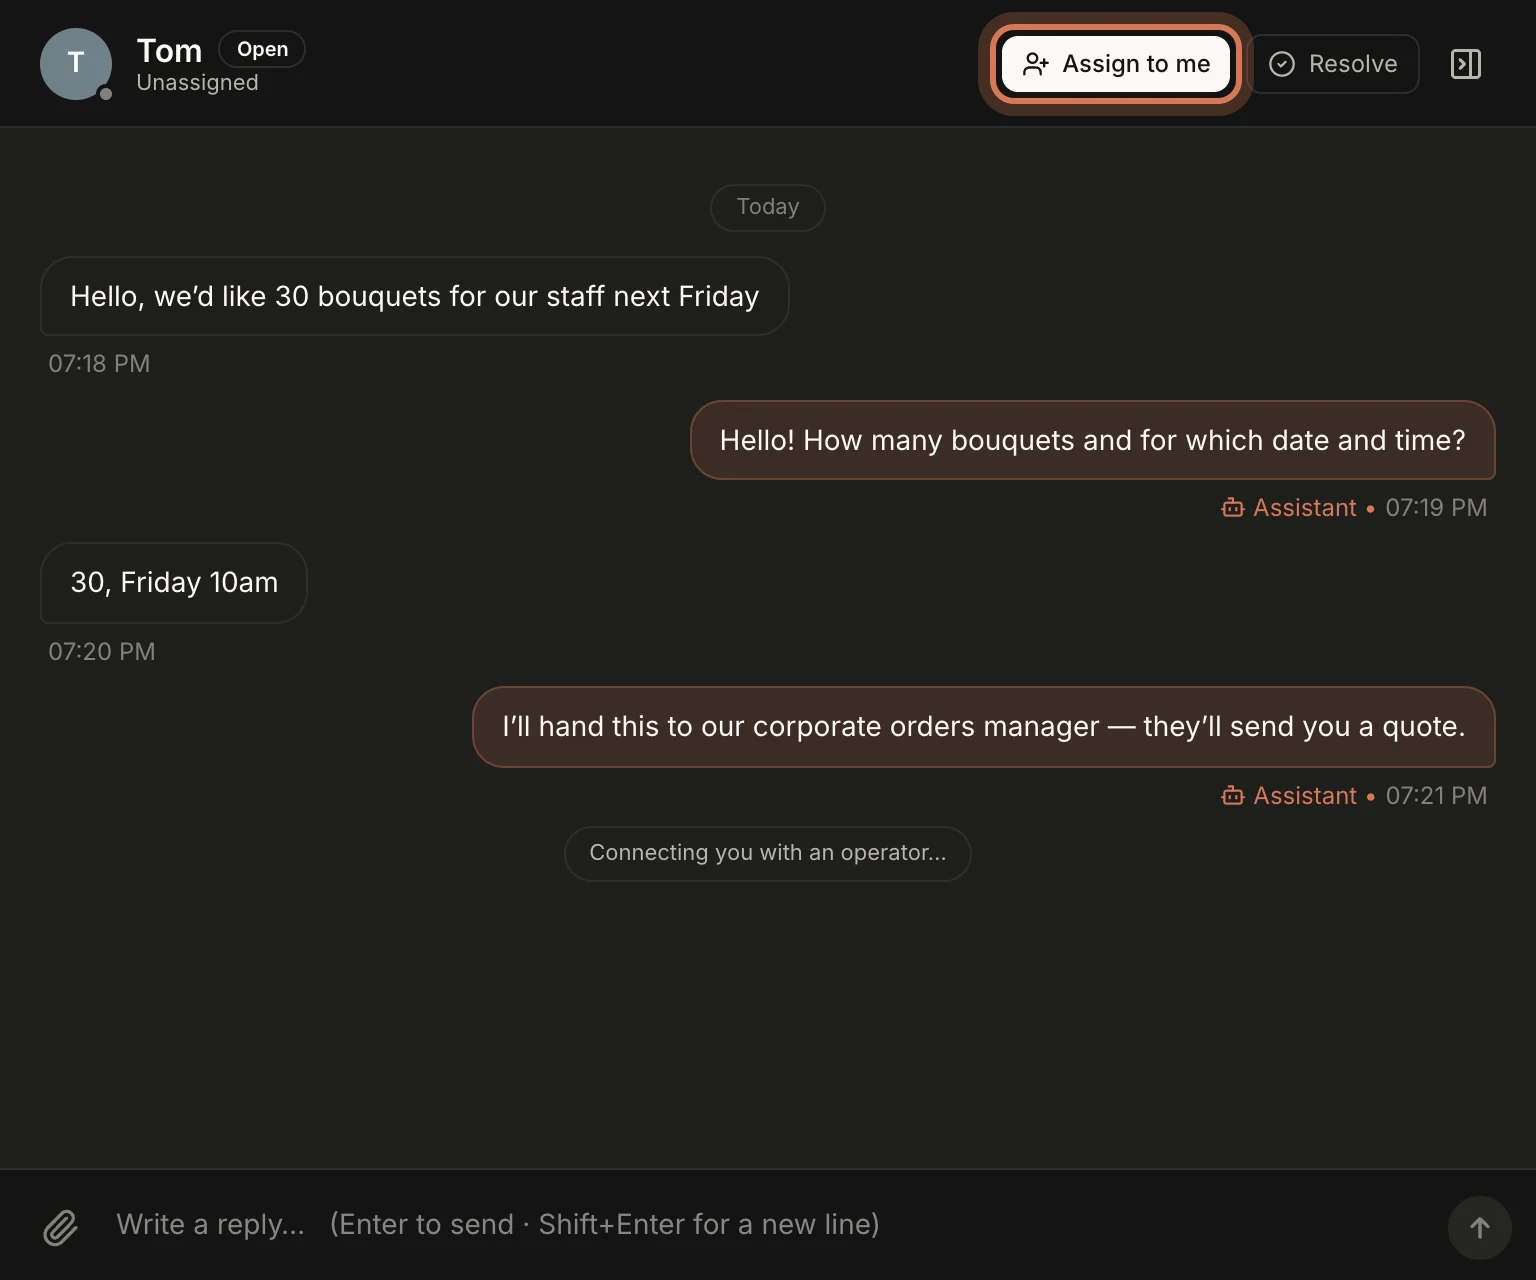
You don't have to click the button: if you simply reply in a chat nobody has taken, it's assigned to you automatically. A line with your name, such as "Emma Clarke joined the conversation", appears in the thread.
The buttons in the chat header change with the situation:
- Assign to me — nobody owns the chat.
- Take over — a colleague is handling it and you want to take it.
- Mine · release — the chat is yours; click to put it back in the shared queue.
- Resolve — the question is sorted.

Step 4. Reply to the visitor
Type in the box at the bottom of the screen:
- Enter sends, Shift+Enter adds a new line.
- ↑ in an empty box edits your last message.
- Esc cancels a quoted reply or an edit.
- The paperclip ("Attach file") — an image, video, PDF or text file up to 10 MB. You can also paste a screenshot straight from the clipboard (Ctrl+V / Cmd+V). The file appears above the box first and goes out with your next message.

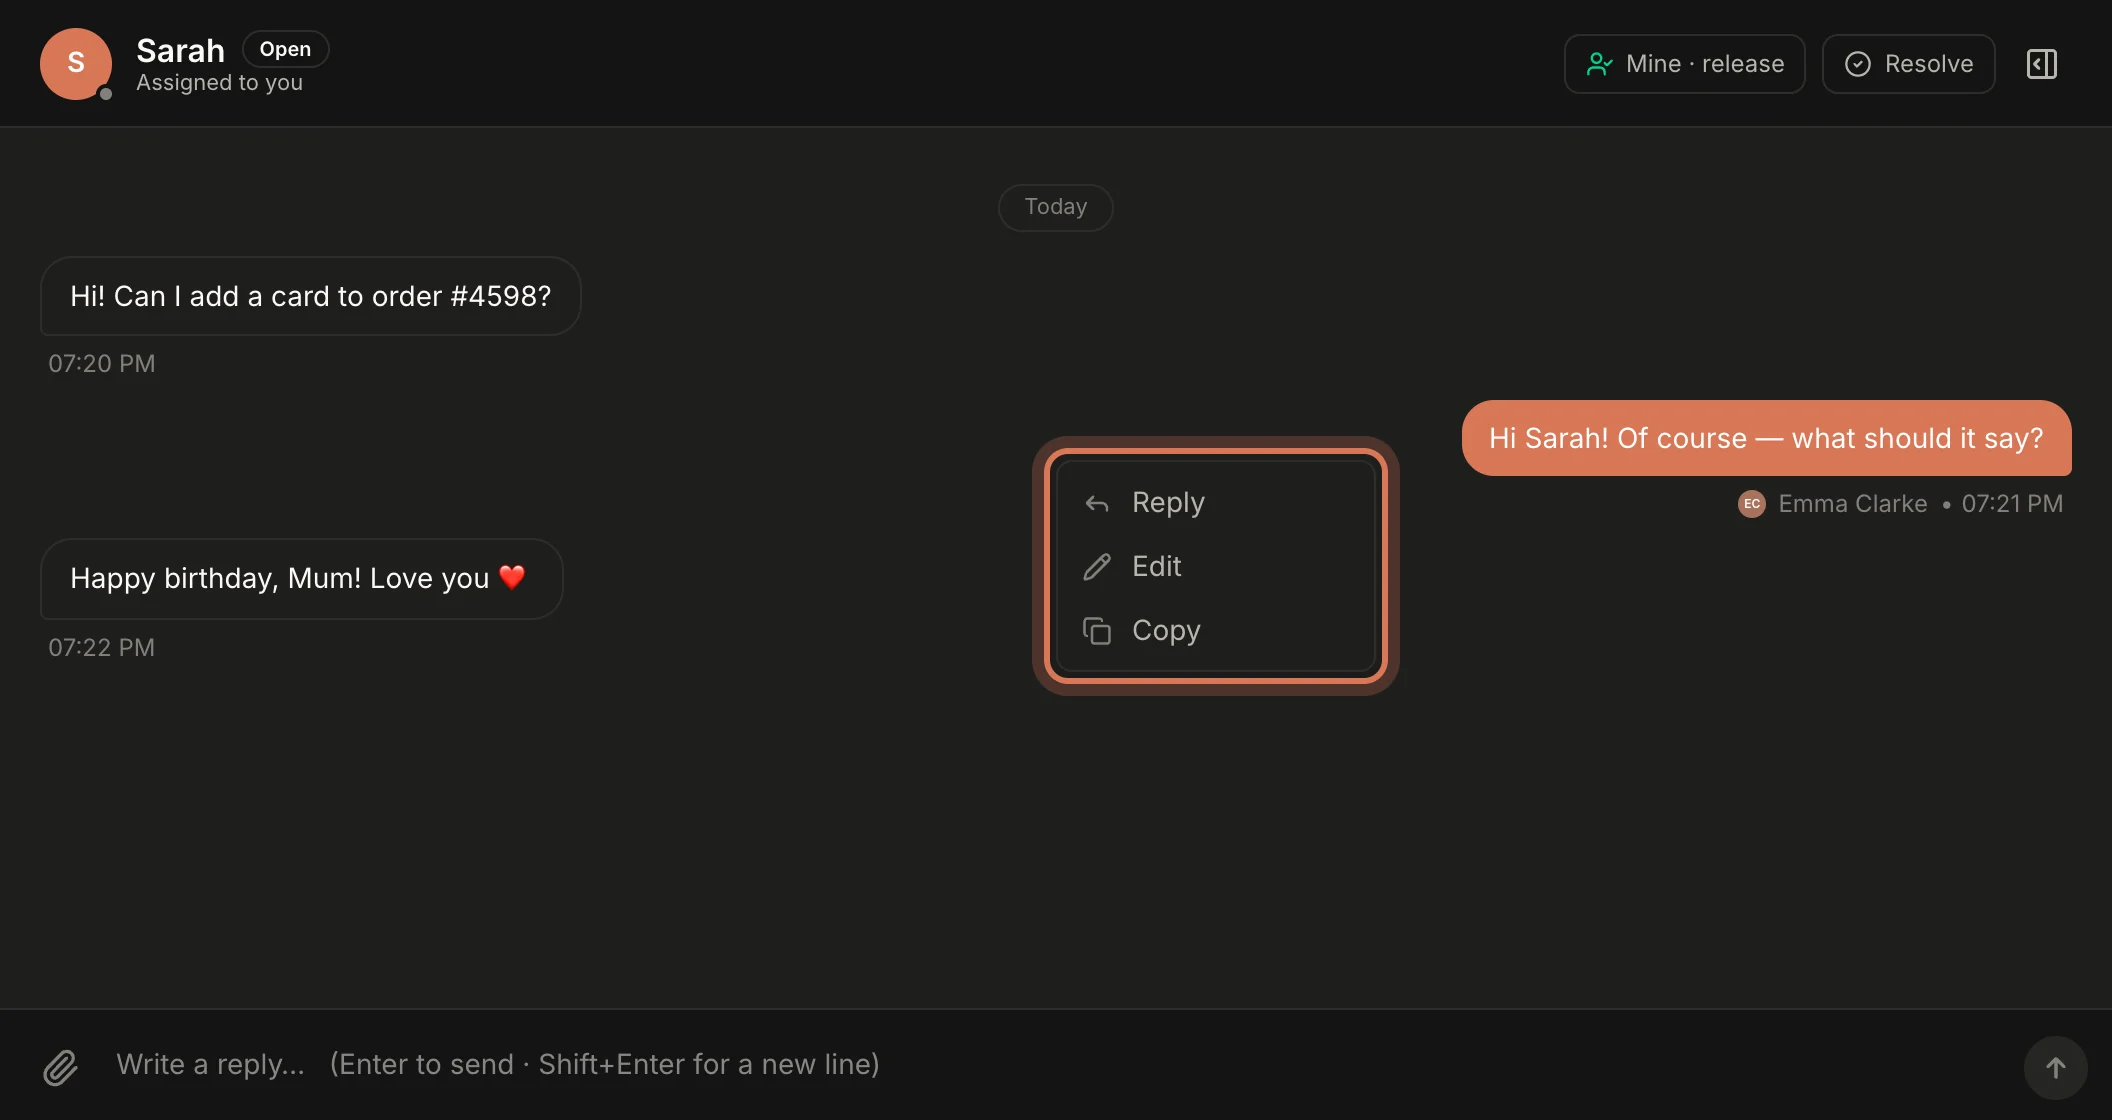
Right-click any message in the thread to open a menu:
- Reply — quote that message in your answer (handy when the visitor asked several things).
- Edit — fix your own message. The visitor sees the new text right away, marked "edited".
- Copy — copy the text.
Step 5. Check the visitor details
The right-hand panel shows everything known about the visitor. If it's hidden, click the panel icon in the top-right corner of the chat.
- Visitor — ID, name, email and phone (if your site passes them). The icon next to a value copies it.
- Device & location — city, local time, browser, OS, language and where they came from.
- Conversation — status, who's handling it, the current page (updates live as the visitor browses your site) and when it started.
- Ratings and Attributes — the scores the visitor gave in this conversation and extra data from your site, such as the number of orders.
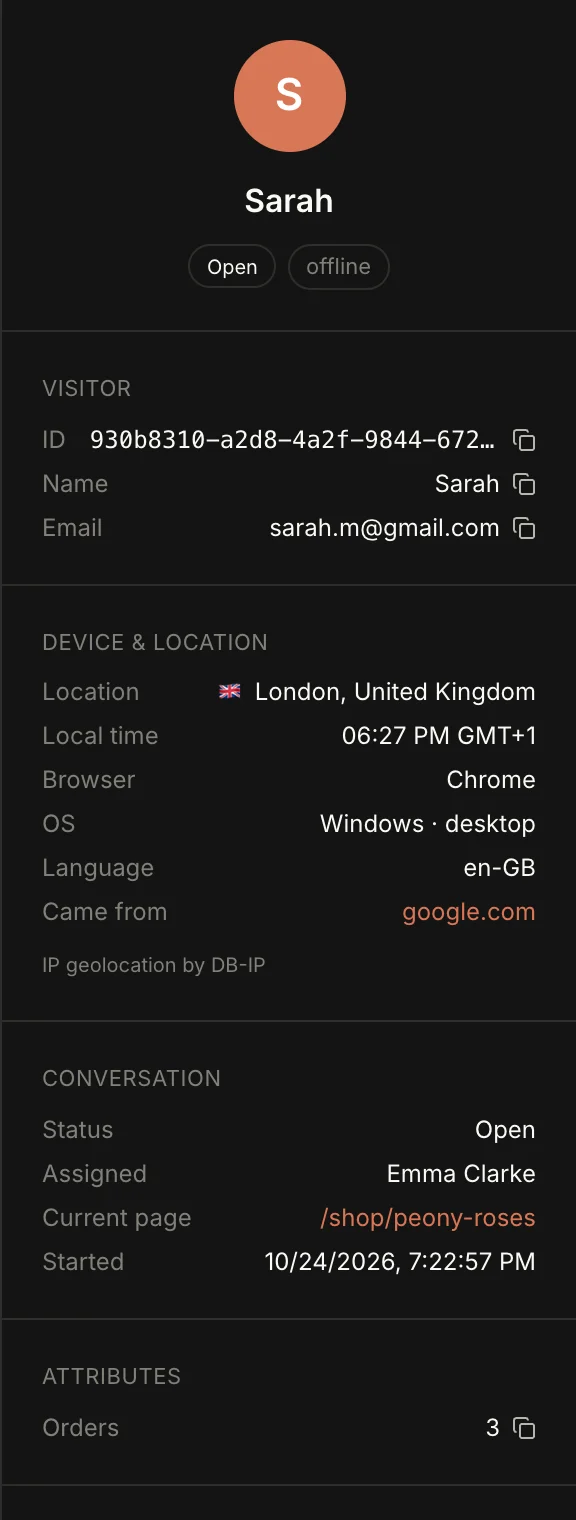
Name, email and other data appear when your site passes them to the chat. See Identify your visitors to set it up.
Step 6. Resolve the conversation
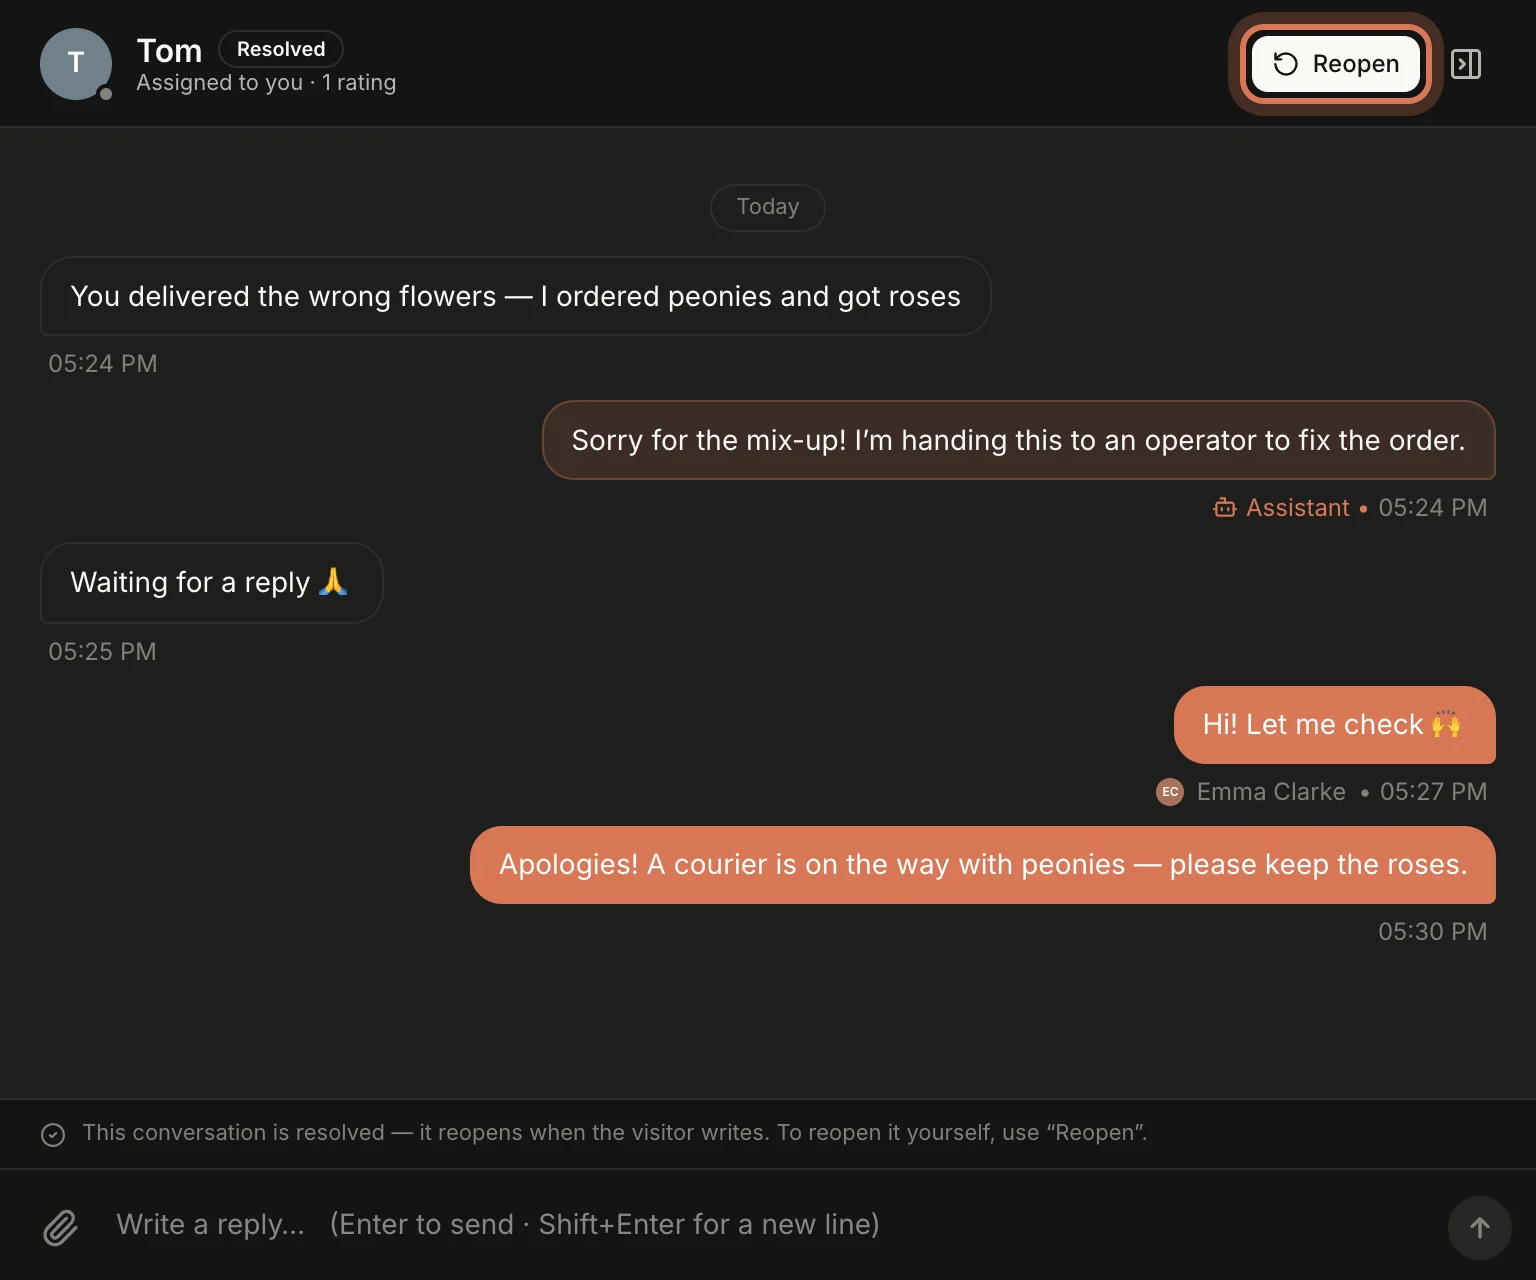
When the question is sorted, click Resolve. The visitor sees a "How did we do?" card and can rate the chat from 1 to 5 stars. Ratings add up in Analytics.
A resolved chat moves to the Closed tab. If the visitor writes again, it reopens on its own. To reopen it yourself, click Reopen.
Step 7. Stepping away? Set yourself to Away
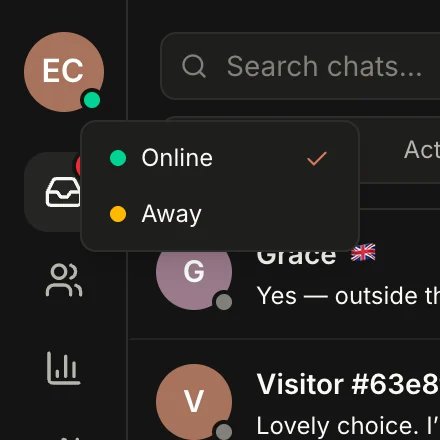
Click the coloured dot on your avatar in the top-left corner and pick a status:
- Online — you're here and ready to answer.
- Away — you've stepped out. It switches back to Online automatically as soon as you reply in a chat or pick one up.
When you close ChatDeck, you show as Offline automatically.
FAQ
Can I assign a chat to a specific colleague?
No: everyone picks up chats themselves with "Assign to me" or "Take over". To hand a conversation on, click "Mine · release" and it goes back to the shared queue.
The bot is answering — can I step in?
Yes. Open the chat in the Open tab and assign it to yourself, or just reply. From then on the bot stays quiet in that chat.
Next: turn on notifications and install the apps so you never miss a new chat.
Still have questions? Write to support@gptunnel.ru — we’ll help you get set up.